|
Editing animations on imported models in Unity doesn't seem like something that can be done, at first glance. But it's a fairly straight forward process. 1. Open up the object in your Project Window whose animation you would like to edit and select the specific animation. Make sure the Animation Window is open. What you'll notice is that the animation says “Read-Only.” Don't worry, you can get around that. 2. With the particular animation selected in your project window, Press Control D (if you're using Windows) to duplicate the animation. A duplicate animation will pop up outside of the object now. This one is not “Read-Only.” *You might get an error message telling you that you now have a duplicate asset. Since that is your goal here, you can just clear the message. 3. Now select the object whose animation you'd like to edit from the Hierarchy, and make sure the Animator Window is open. From there you need to replace the read only animation with the editable animation. You can do that by dragging the new animation from the Project Window into the “Motion” spot in the Inspector. 4. And that's it! Now you can edit your animations from the Animation Window!
0 Comments
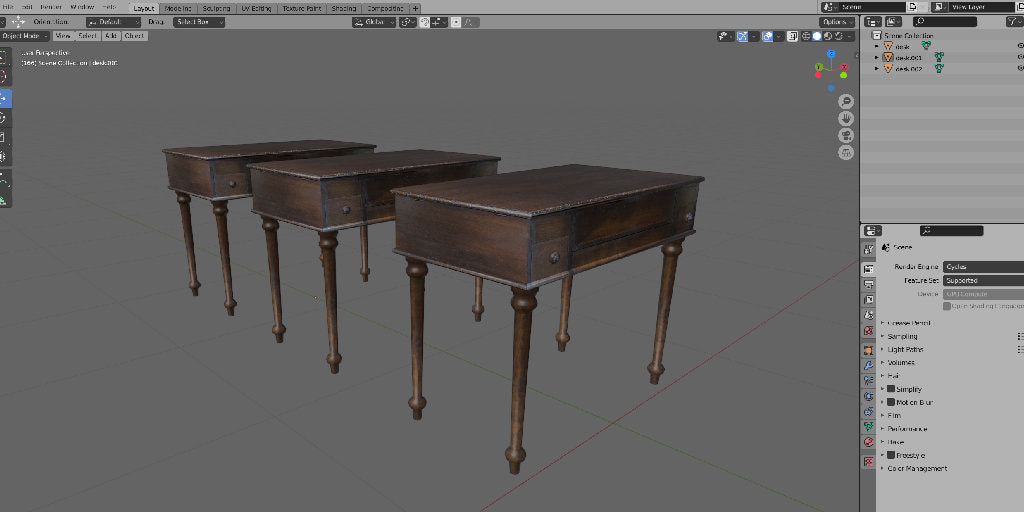
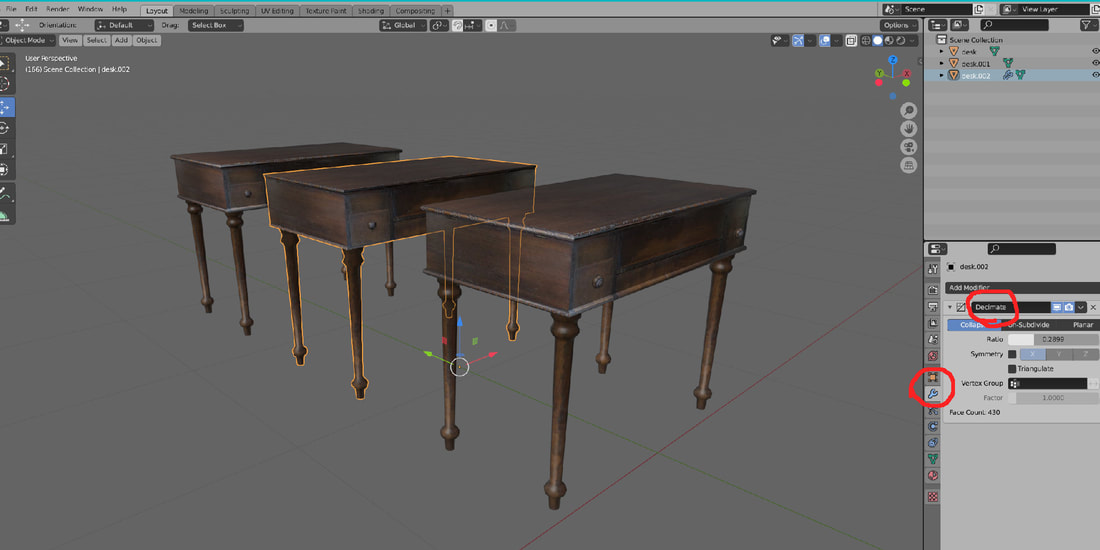
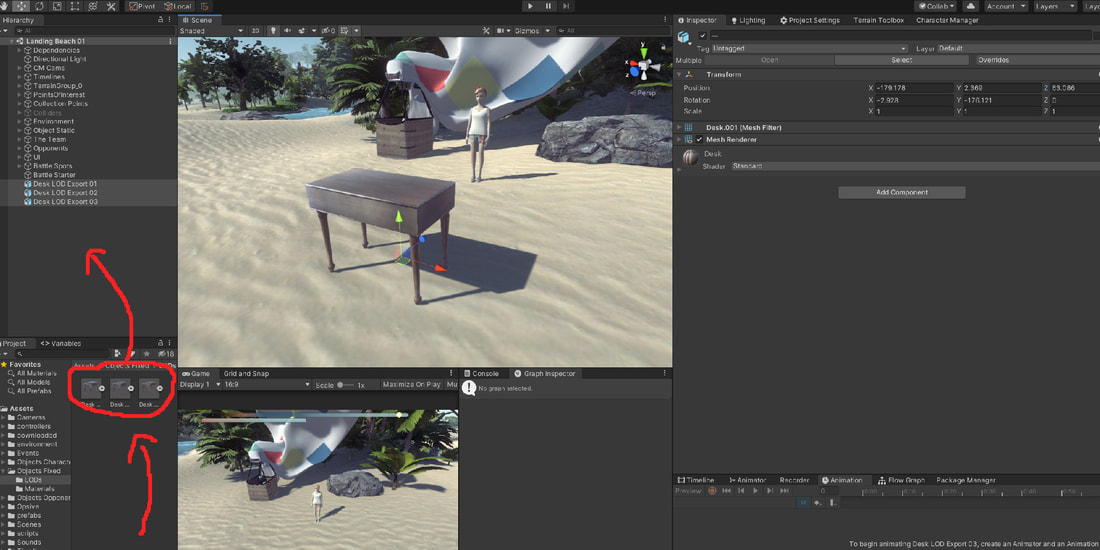
3. Select the 2nd copy of your object, then navigate to the modifiers tab on the right. Select the modifier Decimate. Check the box for Triangulate. Blender behaves better with quads, but Unity triangulates everything that is imported, so you might as well see what that looks like now. Lower the ratio slider until you're happy with the result. Then find the Apply button inside that down arrow (next to the X) and apply your changes. 4. Do the same thing to the rest of your copies, being sure to make them have less and less triangles as you go. 5. Select the first object alone. The undecimated base object. Choose "export as FBX" in File at the top left of the screen. Choose where you'd like to export to and name your file something that will indicate where it goes in the LOD hierarchy. The important export options here are the Transform ones. For Unity, Scale should be 1 and Y is Up. 6. Import the textures first by dragging them into your Project box where you'd like them, and use them to make a material. Then drag your FBXs into the Project box wherever you'd like them. Put your material where it should go by selecting the objects and using the Inspector (find the Materials Tab). Next, select all of your imported objects at the same time and drag them into the Hierarchy. This usually makes them all occupy the same location. If it doesn't, adjust their locations in the Inspector so that they do. If they show up as prefabs, like you see that mine do, unpack them by right clicking on them in the Hierarchy and selecting Unpack Completely. 7. After that, select your object with the most detail and, in the Inspector, Add Component: LOD Group.
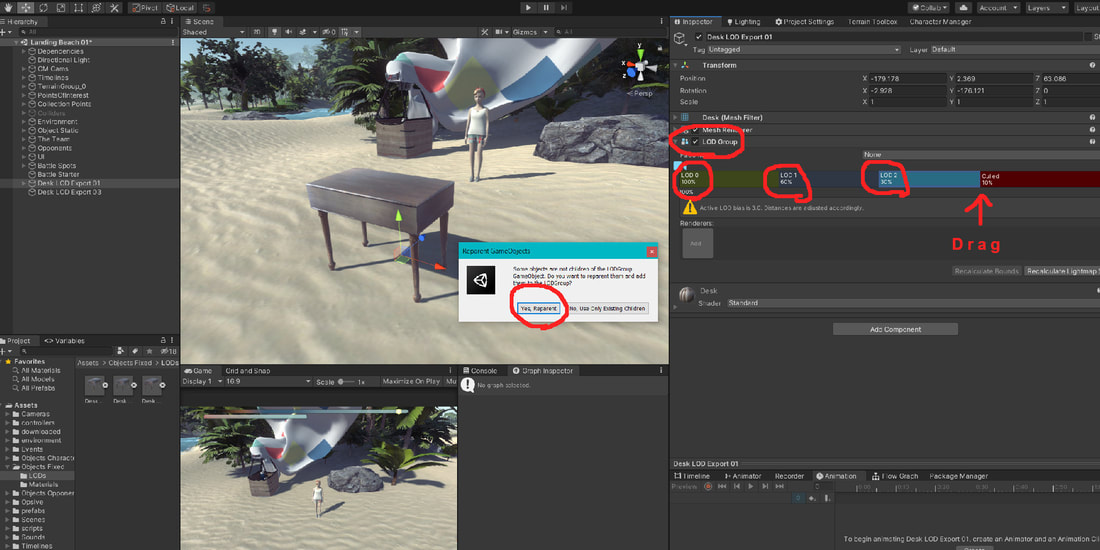
8. Drag your objects from the Hierarchy into the LOD spots in the Inspector. The first spot should be occupied by your most detailed model, and so on. *If you have more than 3 objects to add to the LOD Group, right click on one of the LOD levels in the LOD Group to insert them. A window will pop up asking if you'd like to reparent. Go ahead and do that. And that's it! You can adjust the distances in which the LODs kick in by grabbing and dragging the spots in between where they are housed in the Inspector.
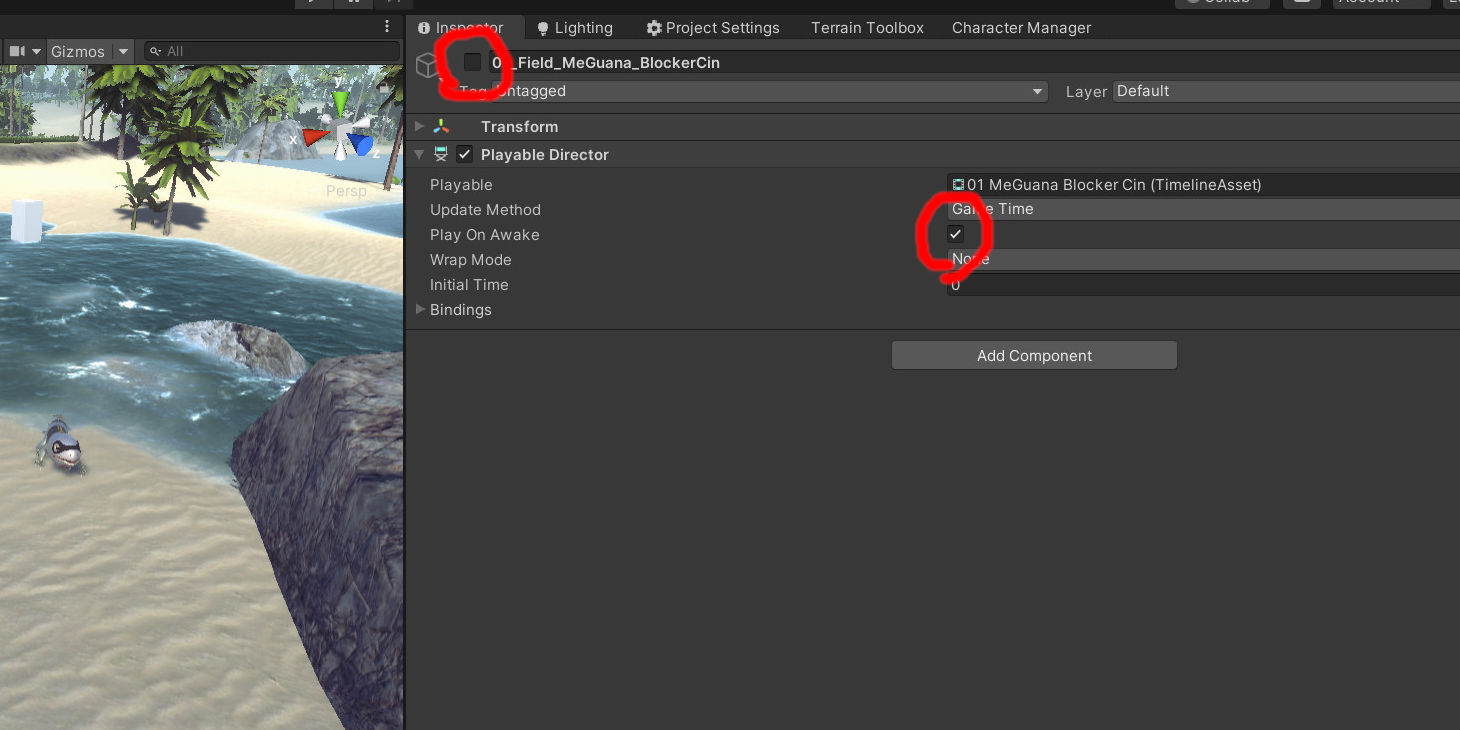
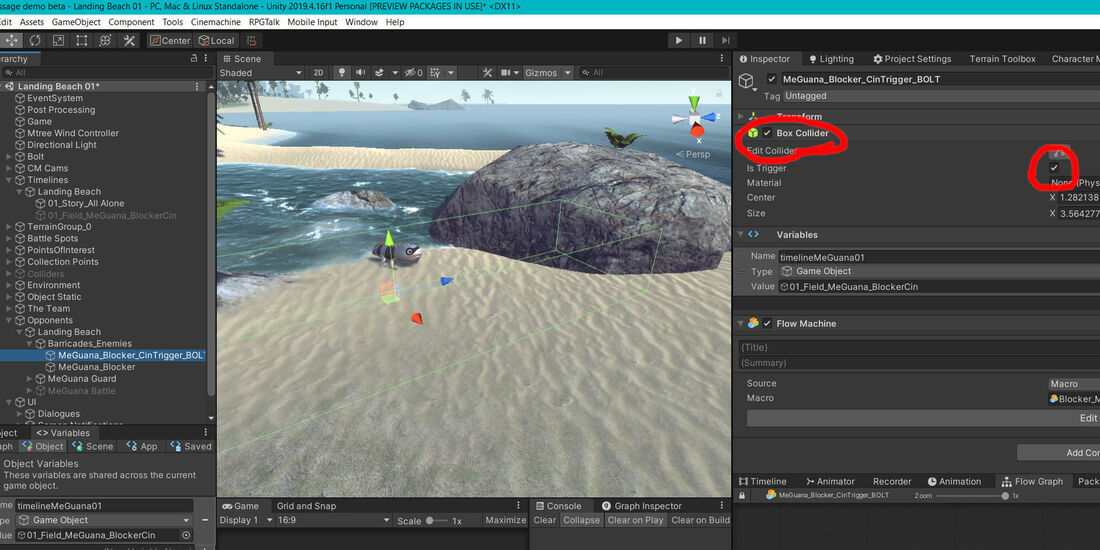
2. Then, attach a Collider to an object in your scene that you want to be the trigger for the timeline, and check the box that says Is Trigger. The Bolt Visual Scripting Component:
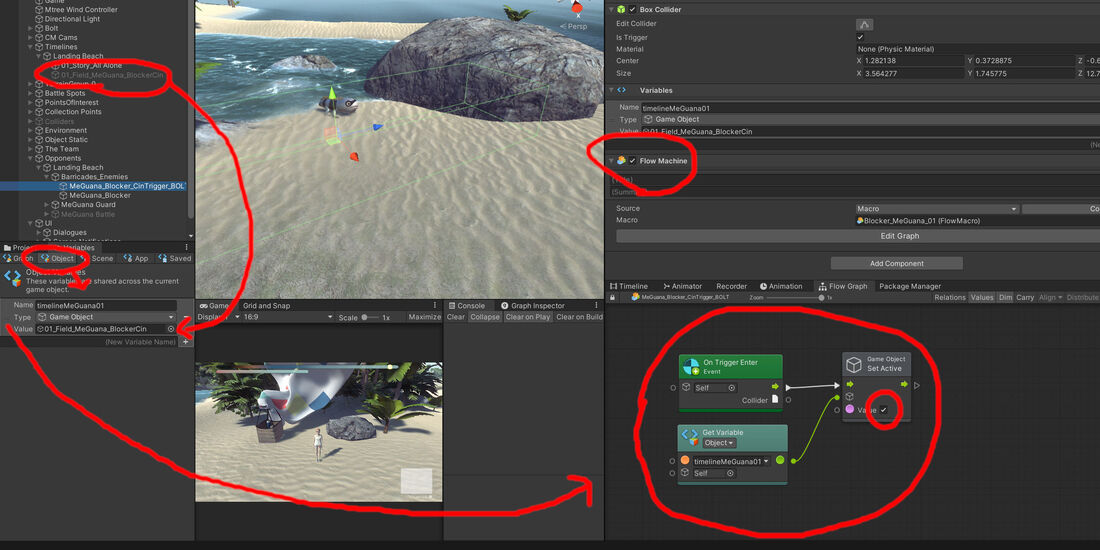
3. Next, add the Flow Machine component to the same object that your Collider resides in and click the New button save it as a macro into your project files. 4. Make an Object Variable and set the Type to Game Object. Drag your Timeline from the Hierarchy into the Variable's Value Field. 5. Drag that Variable you just created into the Flow Graph and use the Fuzzy Finder to add an On Trigger Enter and a Set Active Game Object (check the Boolean to True). 6. Hook all those nodes up the way you see in the picture, and that's it. Good job! Now when your player character-or-whatever runs into the collider, your timeline will trigger. |
DevLogFollow along as Super Juice constructs a Strategy RPG
Kris ChavezArtist, Author, Indy Game Designer, Happy Husband, Half Robot, Three Quarters Cat Archives
May 2022
Categories |



 RSS Feed